Google Tag Manager offers a simple way to set up ImpactHero and send all the events you want to track on your website to the tool without having to implement the code on each page of your website.
Adding the ImpactHero Tracking Tag
The main tag used to send events from the tracked website to ImpactHero. To add it from the GTM template gallery follow the instructions below:
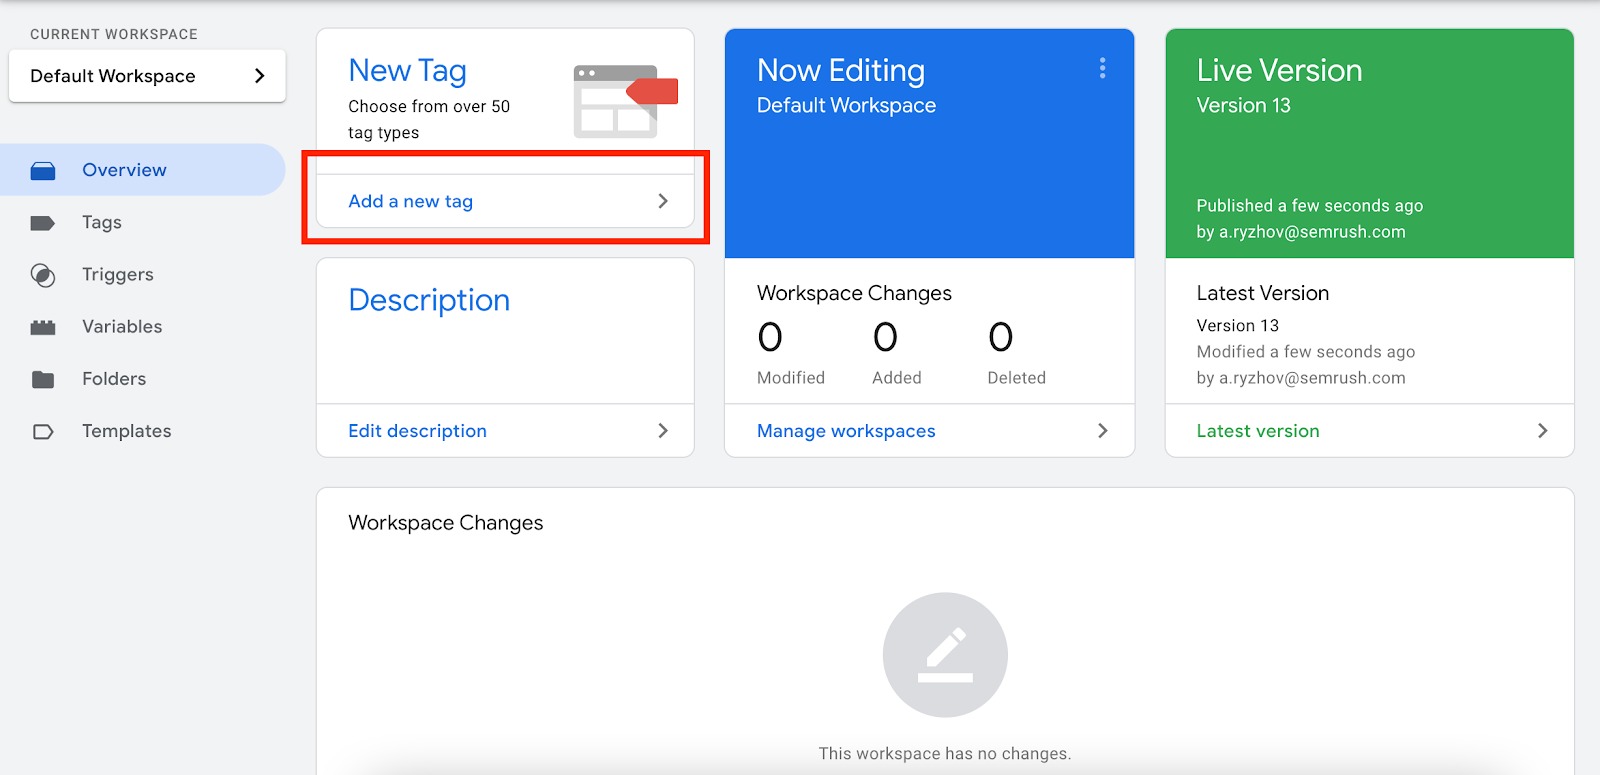
1. Open the Google Tag Manager Dashboard and Click ‘Add a new tag’.
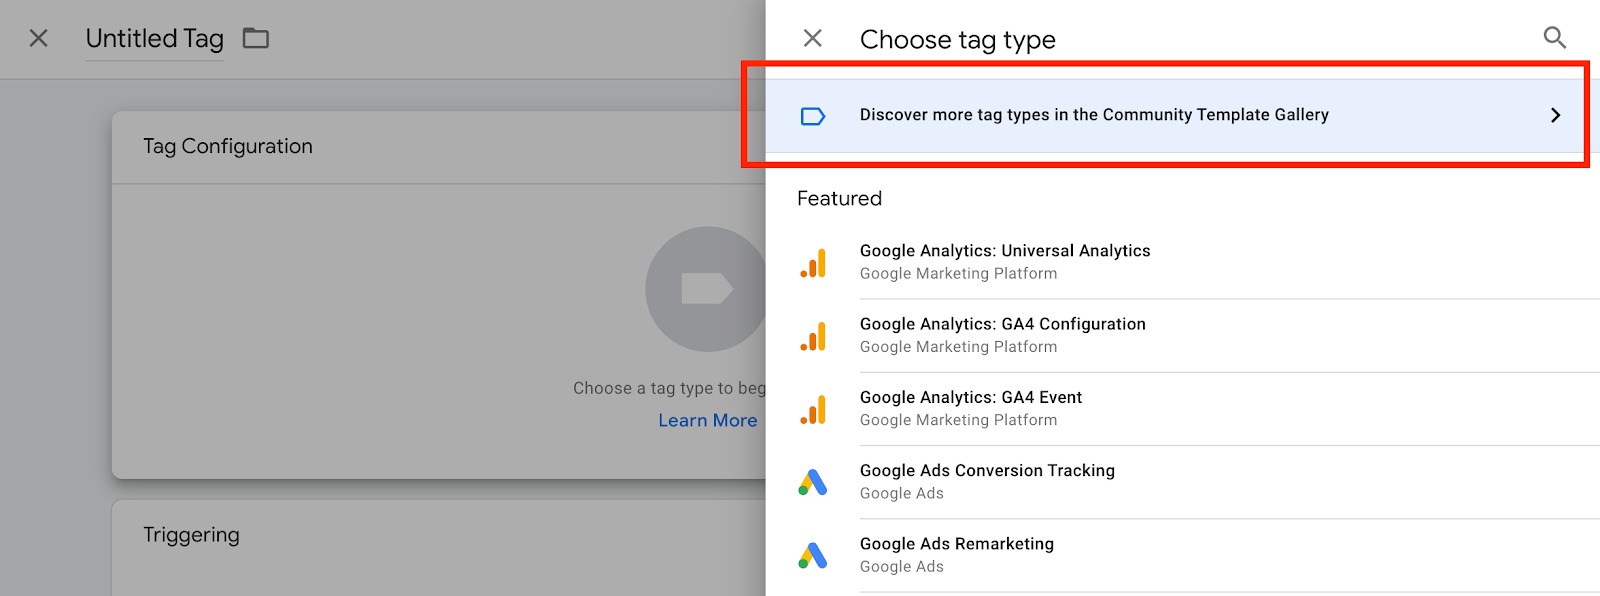
2. In the Tag Configuration section, choose ‘Discover more tag types in the Community Template Gallery’ and search for ‘ImpactHero main tag.’

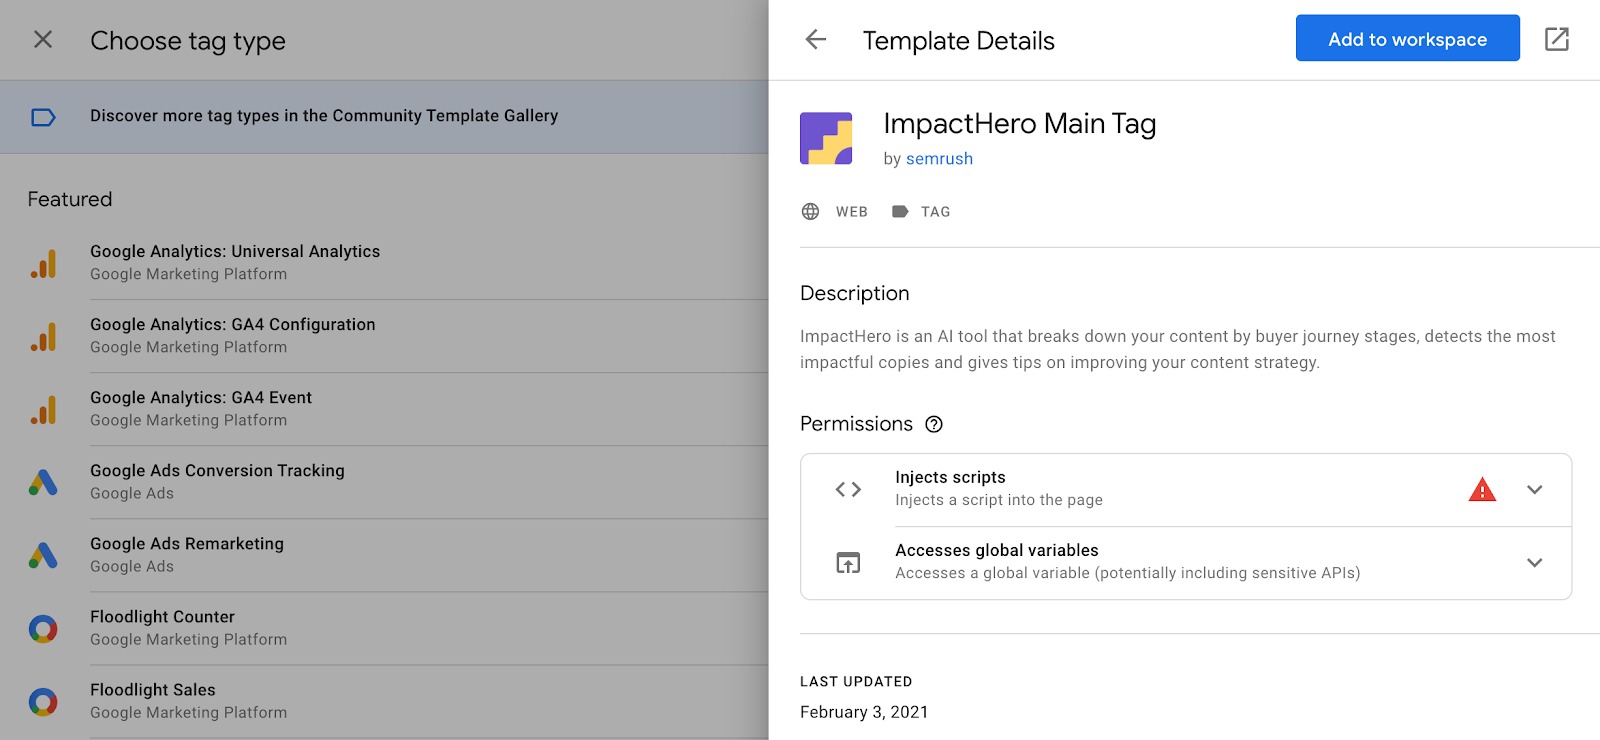
3. Click ‘Add to workspace’ and confirm.
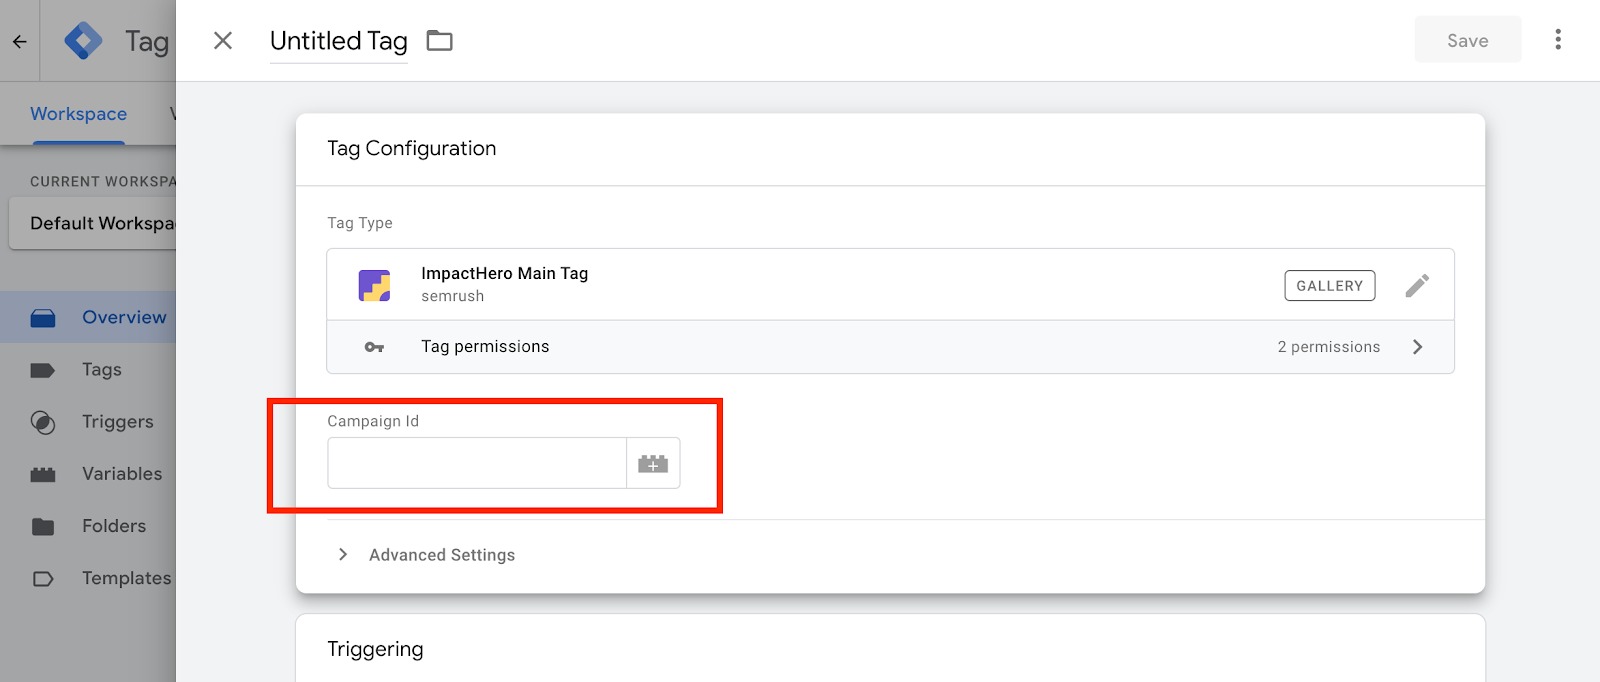
4. Paste the Campaign ID from the ImpactHero setup page into the corresponding field.
5. In the “Triggering” section add the “All pages” trigger (or something custom if you need to).
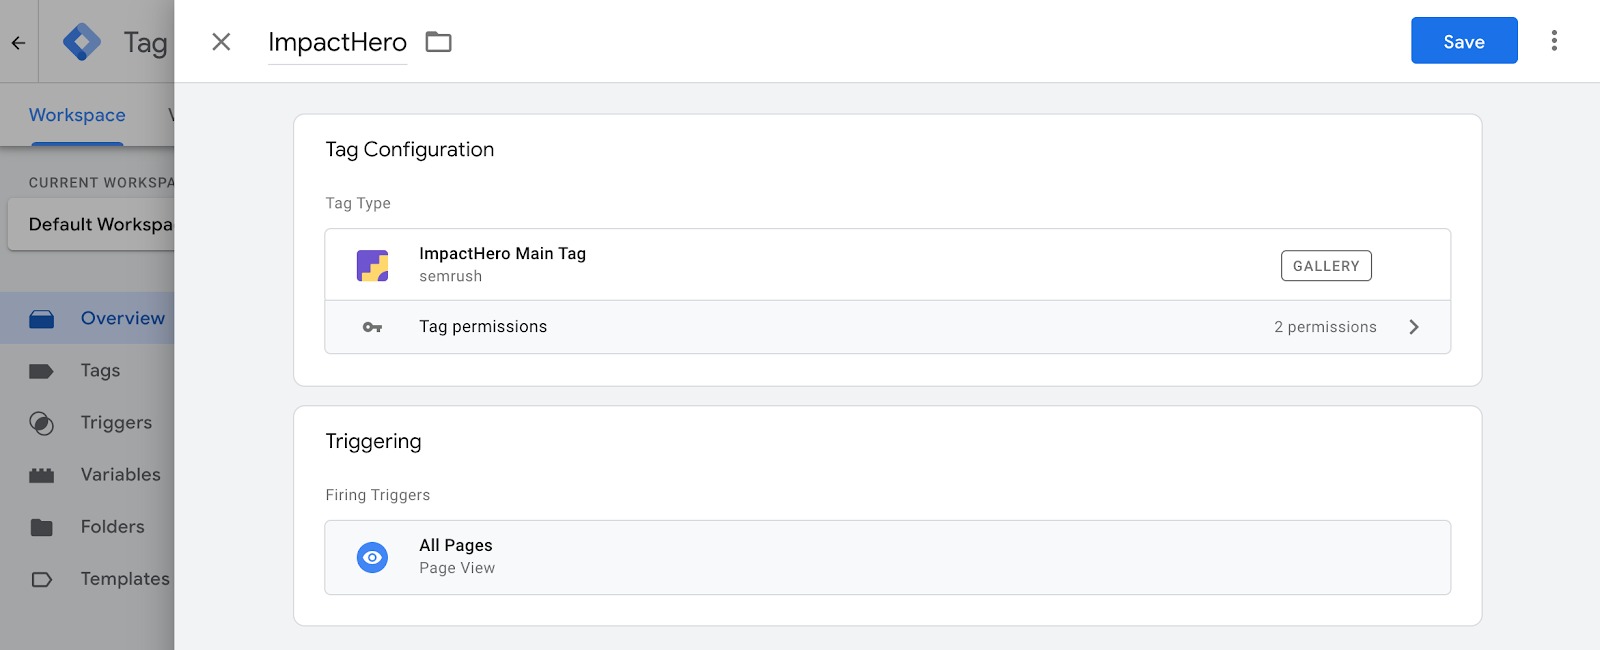
6. Save the tag and publish the changes
Adding a Custom Goal Trigger Tag
By default, ImpactHero automatically tracks the submission of all lead generation forms on your website. To track more events, you can set up what are known as custom goals.
To add a custom goal trigger tag from the GTM template gallery follow the instructions below:
1. Open Google Tag Manager Dashboard and make sure that the ‘ImpactHero Main tag’ is already installed (see the previous section).
2. Click on the ‘Add a new tag’ button.
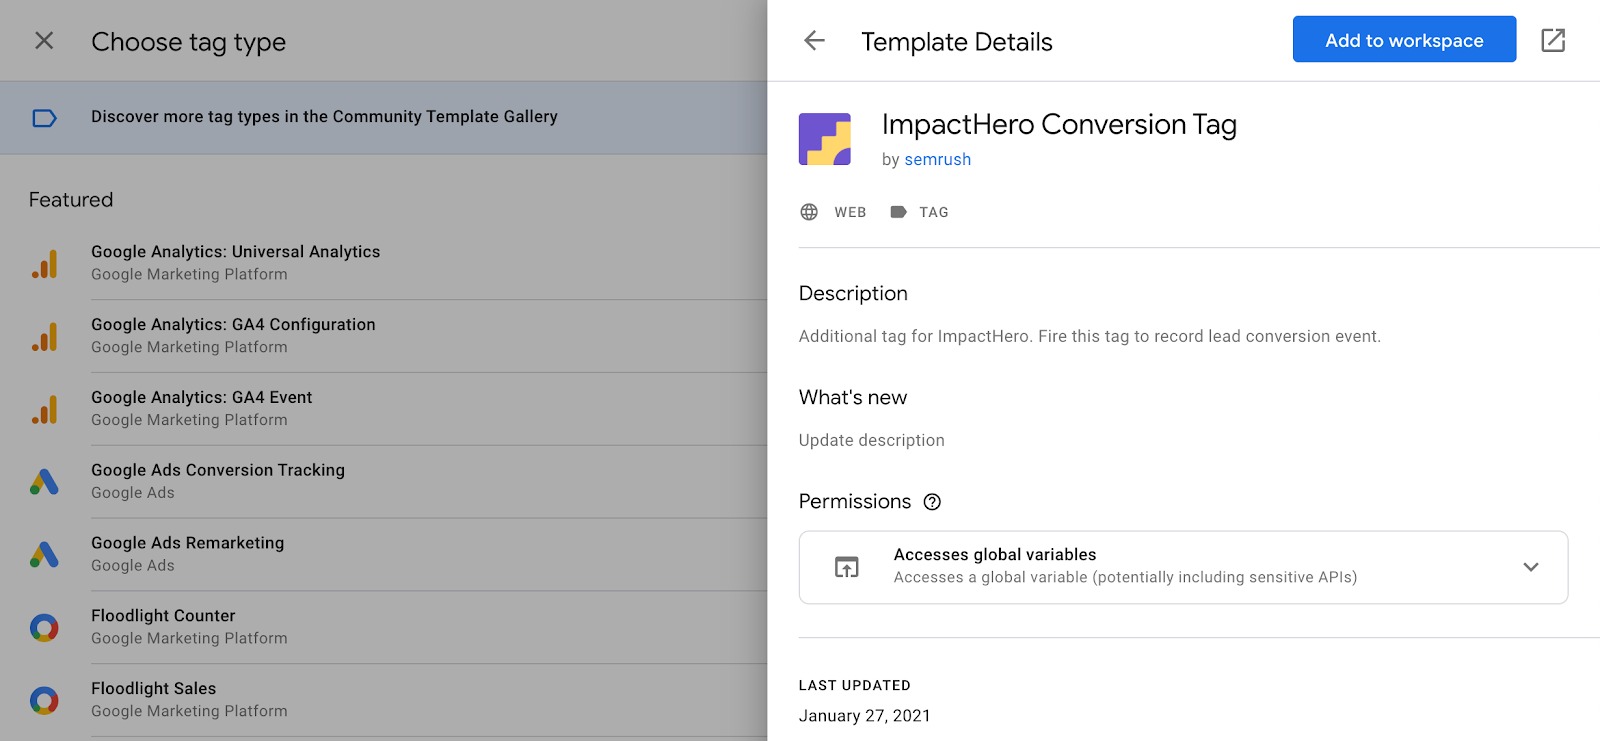
3. In the Tag Configuration section choose ‘Discover more tag types in the Community Template Gallery’ and search for ‘ImpactHero Conversion Tag’.
4. Click ‘Add to workspace’ and confirm.
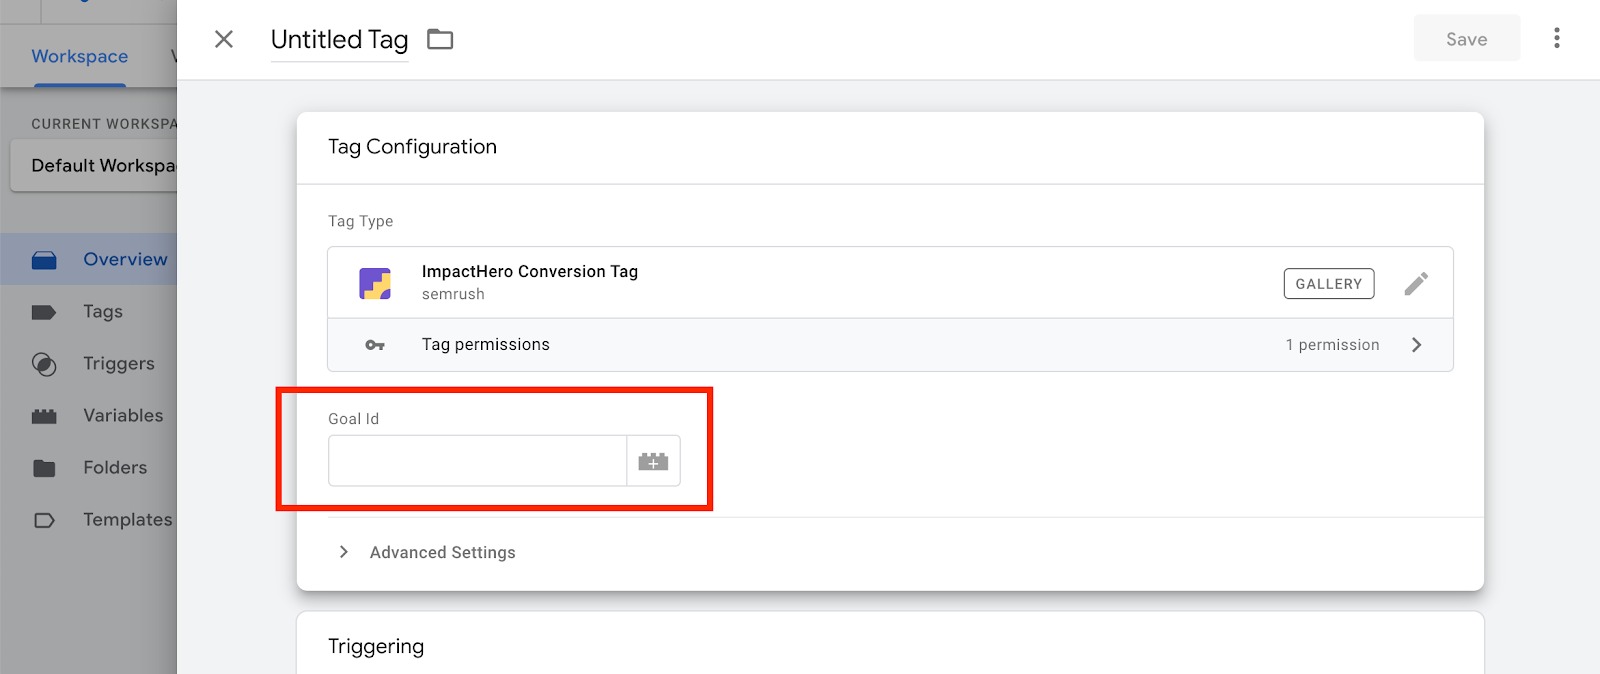
5. Paste the Goal ID from the ImpactHero goals setup window into the corresponding field.
6. In the ‘Triggering’ section add the required conditions.
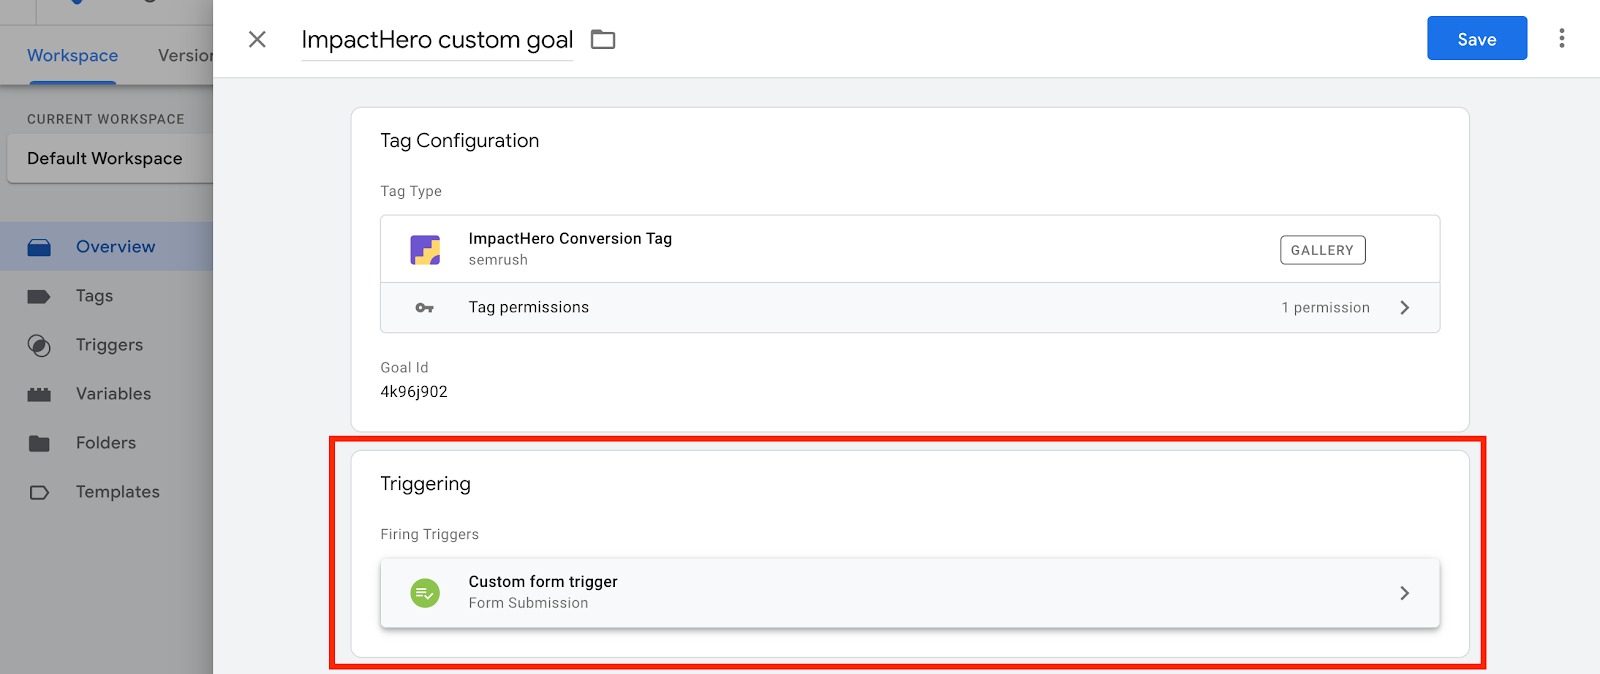
7. Save the tag.
8. Repeat for additional goals.
9. Publish workspace changes.
10. Make sure these goals are enabled in the ImpactHero interface.